Activité : Installation de l'interface webui
Shinken comprend une interface web (webui) qu'il faut installer. Elle s'appuie sur un serveur http interne ne nécessitant pas de composant supplémentaire comme apache par exemple.
Il faut systématiquement se connecter avec l'utilisateur shinken dès lors qu'on ajoute des éléments à shinken. Car les différents exécutables de shinken utilisent l'uid shinken. Il faut donc que les nouveaux fichiers installés bénéficient des droits shinken et non root.
On va donc ouvrir une session terminal et se connecter avec l'utilisateur shinken :
root@ctShinken:~# su - shinken
shinken@ctShinken:~$
Installation de l'interface Web
Pour installer l'interface web :
shinken@ctShinken:~$ shinken install webui
Grabbing : webui
OK webui
Après cela le nouveau module webui est installé :
shinken@ctShinken:~$ exit
root@ctShinken:~# ls /var/lib/shinken/modules/
dummy_arbiter  dummy_broker_external  dummy_scheduler  webui
dummy_broker   dummy_poller	      __init__.py
Et un nouveau fichier de configuration webui.cfg est créé :
root@ctShinken:~# ls /etc/shinken/modules/
sample.cfg  webui.cfg
Avec le contenu suivant :
## Module:      webui
## Loaded by:   Broker
# The Shinken web interface and integrated web server.
define module {
    module_name         webui
    module_type         webui
    host                0.0.0.0     ; All interfaces = 0.0.0.0
    port                7767
    auth_secret         CHANGE_ME   ; CHANGE THIS or someone could forge cookies
    allow_html_output   1       ; Allow or not HTML chars in plugins output.
                                ; WARNING: Allowing can be a security issue.
    max_output_length   1024     ; Maximum output length for plugin output in webui
    manage_acl          1       ; Use contacts ACL. 0 allow actions for all.
    play_sound          0       ; Play sound on new non-acknowledged problems.
    login_text          Welcome on Shinken WebUI    ; Text in the login form.

    ## Modules for WebUI
    # - auth-htpasswd         = Use an htpasswd file for auth backend.
    # - auth-active-directory = Use AD for auth backend (and retrieve photos).
    # - auth-cfg-password     = Use the password setted in Shinken contact for auth.
    # - ui-pnp                = Use PNP graphs in the UI.
    # - ui-graphite           = Use graphs from Graphite time series database.
    # - mongodb               = Save user preferences to a Mongodb database
    # - SQLitedb              = Save user preferences to a SQLite database
    modules
    ## Advanced Options
    # Don't play with them on your production server ;)
    #http_backend            auto    ; Choice is: auto, wsgiref or cherrypy if available
    #remote_user_enable      1       ; If WebUI is behind a web server which
                                     ; has already authentified user, enable.
    #remote_user_enable      2       ; Look for remote user in the WSGI environment
                                     ; instead of the HTTP header. This allows
                                     ; for fastcgi (flup) and scgi (flupscgi)
                                     ; integration, eg. with the apache modules.
    #remote_user_variable    X_Remote_User  ; Set to the HTTP header containing
                                     ; the authentificated user s name, which
                                     ; must be a Shinken contact.
    # If you got external plugins (pages) to load on webui
    #additional_plugins_dir

}
A remarquer :
- le nom et le type du module : webui
- l'adresse IP de l'hôte : 0.0.0.0
- le port d'écoute : 7767
Pour prendre en compte le nouveau module webui, il faut relancer shinken :
root@ctShinken:~# /etc/init.d/shinken restart
Pour se connecter à l'interface Web de Shinken rendez-vous à l'url http://adressIPdeVotreServeur:7767

Vous ne pouvez pas vous connecter car il n'y a pas de liaison entre le module Broker et webui. Il faut modifier le fichier de configuration du broker /etc/shinken/brokers/broker-master.cfg ainsi (en complétant la ligne modules webui)
#===============================================================================
# BROKER (S1_Broker)
#===============================================================================
# Description: The broker is responsible for:
# - Exporting centralized logs of all Shinken daemon processes
# - Exporting status data
# - Exporting performance data
# - Exposing Shinken APIs:
#   - Status data
#   - Performance data
#   - Configuration data
#   - Command interface
# https://shinken.readthedocs.org/en/latest/08_configobjects/broker.html
#===============================================================================
define broker {
    broker_name     broker-master
    address         localhost
    port            7772
    spare           0

    ## Optional
    manage_arbiters     1   ; Take data from Arbiter. There should be only one
                            ; broker for the arbiter.
    manage_sub_realms   1   ; Does it take jobs from schedulers of sub-Realms?
    timeout             3   ; Ping timeout
    data_timeout        120 ; Data send timeout
    max_check_attempts  3   ; If ping fails N or more, then the node is dead
    check_interval      60  ; Ping node every N seconds

    ## Modules
    # Default: None
    # Interesting modules that can be used:
    # - simple-log              = just all logs into one file
    # - livestatus              = livestatus listener
    # - tondodb-mysql           = NDO DB support
    # - npcdmod                 = Use the PNP addon
    # - graphite                = Use a Graphite time series DB for perfdata
    # - webui                   = Shinken Web interface
    # - glpidb                  = Save data in GLPI MySQL database
    modules     webui

    # Enable https or not
    use_ssl	          0
    # enable certificate/hostname check, will avoid man in the middle attacks
    hard_ssl_name_check   0

    ## Advanced
    realm   All
}
Redémarrez shinken et connectez-vous à nouveau à l'interface Web :
root@ctShinken:~# service shinken restart

- Authentifiez-vous avec le compte admin (mot de passe admin) comme indiqué dans la documentation mais…
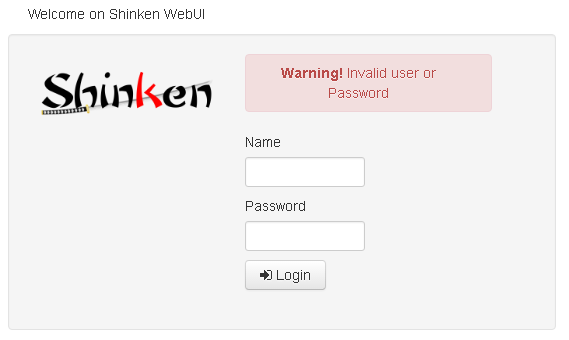

Il faut implémenter une méthode d'authentification pour webui (voir http://shinken.readthedocs.org/en/latest/11_integration/webui.html?highlight=webui)
Vous allez utiliser une méthode simple basée sur les contacts, c’est-à-dire sur les utilisateurs déclarés dans /etc/shinken/contacts/admin.cfg.
# This is a default admin
# CHANGE ITS PASSWORD!

define contact{
    use             generic-contact
    contact_name    admin
    email           shinken@localhost
    pager           0600000000   ; contact phone number
    password        admin
    is_admin        1
    expert	    1
}
Utilisez à nouveau le client shinken pour rechercher les modules d'authentification associés à webui.
root@ctShinken:~# su - shinken
shinken@ctShinken:~$ shinken search webui auth

shinken@debianWheezy:~$ shinken search webui auth
auth-active-directory (naparuba) [module,broker,webui,auth,authentification,auth-active-directory] : Active directory auth for WebUI
auth-cfg-password (naparuba) [module,auth,authentification,mod-auth-cfg-password,auth-cfg-password,cfg-password,webui] : Shinken module for UI authentification from simple password for configuration file
auth-htpasswd (naparuba) [module,webui,auth,authentification] : Shinken module for UI authentification from Apache passwd files
auth-pam (mingbo_wan) [module,auth,authentification,auth-cfg-pam,cfg-pam,webui] : Shinken module for UI authentification via pam
auth-ws-glpi (mohierf) [module,broker,webui,glpi,auth,authentication] : Authenticate Web UI users upon a Glpi Web Service login.
- Installez le bon module : <code shell> shinken@ctShinken:~$ shinken install auth-cfg-password Grabbing : auth-cfg-password OK auth-cfg-password </code>
Vérifiez l'installation :
shinken@ctShinken:~$ exit
root@ctshinken:~# ls /var/lib/shinken/modules/
auth-cfg-password  dummy_broker		  dummy_poller	   __init__.py
dummy_arbiter	   dummy_broker_external  dummy_scheduler  webui

root@ctshinken:~# ls /etc/shinken/modules/
auth_cfg_password.cfg  sample.cfg  webui.cfg
- Regardez le fichier de configuration authcfgpassword.cfg du nouveau module : <code> ## Module: auth-cfg-password ## Loaded by: WebUI # Check authentification using password parameter in contact definition. define module { modulename auth-cfg-password moduletype cfgpasswordwebui } </code>
- Il faut modifier le fichier de configuration du module webui /etc/shinken/modules/webui.cfg pour lui indiquer la méthode d'authentification.
Modification dans webui.cfg :
   port                7767
    auth_secret         CHANGE_ME   ; CHANGE THIS or someone could forge cookies
    allow_html_output   1       ; Allow or not HTML chars in plugins output.
                                ; WARNING: Allowing can be a security issue.
    max_output_length   1024     ; Maximum output length for plugin output in webui
    manage_acl          1       ; Use contacts ACL. 0 allow actions for all.
    play_sound          0       ; Play sound on new non-acknowledged problems.
    login_text          Welcome on Shinken WebUI    ; Text in the login form.
    modules             auth-cfg-password
- Redémarrez shinken et connectez-vous à nouveau à l'interface web d'administration : <code shell> root@ctShinken:~# service shinken restart </code>
 Vous avez maintenant accès à l'interface même la configuration de base n'est pas terminée.
L'interface principale webUI est accessible par le port 7767. D'autres interfaces sont utilisables. Le module broker dont dépend webui permet une entière liberté de choix.
Vous avez maintenant accès à l'interface même la configuration de base n'est pas terminée.
L'interface principale webUI est accessible par le port 7767. D'autres interfaces sont utilisables. Le module broker dont dépend webui permet une entière liberté de choix.
Shinken permet de gérer des utilisateurs (contacts). Ils sont définis dans le répertoire /etc/shinken/contacts :
root@ctShinken:~# ls /etc/shinken/contacts
admin.cfg  guest.cfg
Voici le contenu de ce deux fichiers contact après l'installation :
root@ctShinken:~# cat /etc/shinken/contacts/admin.cfg
# This is a default admin
# CHANGE ITS PASSWORD!

define contact{
    use             generic-contact
    contact_name    admin
    email           shinken@localhost
    pager           0600000000   ; contact phone number
    password        admin
    is_admin        1
    expert	    1
}
root@ctShinken:~# cat /etc/shinken/contacts/guest.cfg

# This is a default guest user
# CHANGE ITS PASSWORD or remove it
define contact{
    use                 generic-contact
    contact_name        guest
    email               guest@localhost
    password            guest
    can_submit_commands 0
}
Le mot clé define permet de créer une instance d'objet. Ici un objet contact.
Par défaut, Shinken configure 2 contacts :
- admin : un compte avec le statut d'administrateur (isadmin 1) * guest : un utilisateur avec le statut d'invité. Il peut consulter l'état des différents équipements surveillés mais ne peut effectuer aucune action (cansubmitcommands 0) Il faudrait bien sûr changer ce mot de passe, mais vous ne le ferez pas pour l'instant. Il reste quelques réglages à opérer pour avoir une installation prête pour la supervision. En effet, le dashboard (tableau de bord) ne fonctionne pas.
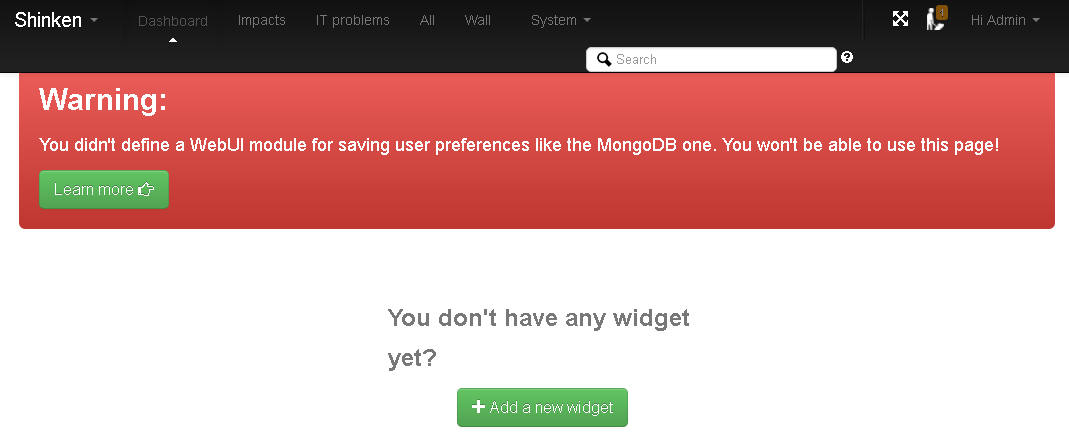 Comme cela est indiqué, il faut installer une base de données pour stocker les préférences utilisateurs. Il est possible d'utiliser mongodb ou SQLite. Vous allez utiliser SQLite.
Pour installer SQLite il faut procéder en 2 étapes.
* Installer les paquets :
<code shell>
root@ctShinken:~# apt-get install mongodb python-pymongo
</code>
* Installez le module sqlitedb pour shinken (rappel : terminal avec su – shinken toujours).
<code shell>
root@ctShinken:~# su - shinken
shinken@ctShinken:~$ shinken install sqlitedb
shinken@ctShinken:~$ exit
root@ctShinken:~#
</code>
* Etablissez une relation entre webui et sqlitedb dans le fichier de configuration de webui /etc/shinken/modules/webui.cfg :
<code>
modules auth-cfg-password,SQLitedb
</code>
(Attention pas d'espace entre les différents modules).
* Pour finir, il ne faut pas oublier de relancer shinken :
<code shell>
root@ctShinken:~# service shinken restart
</code>
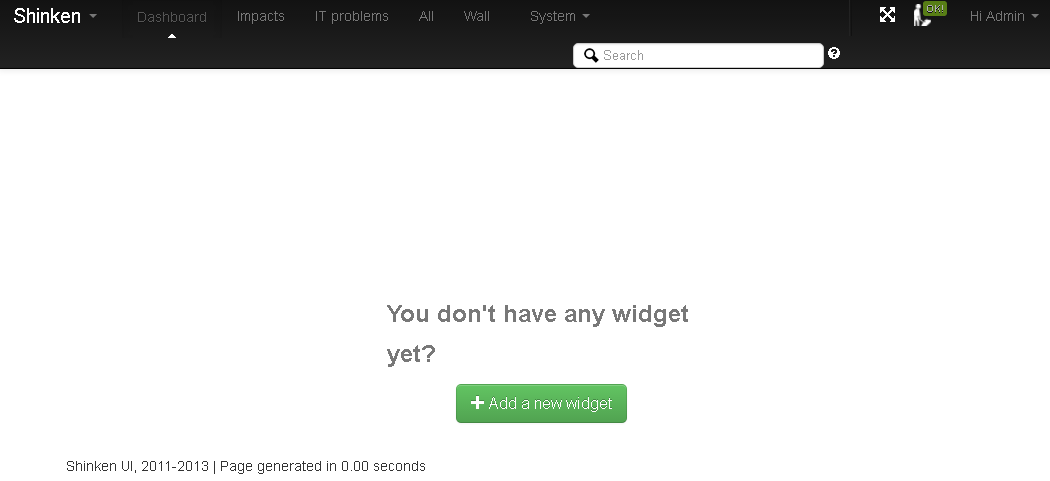
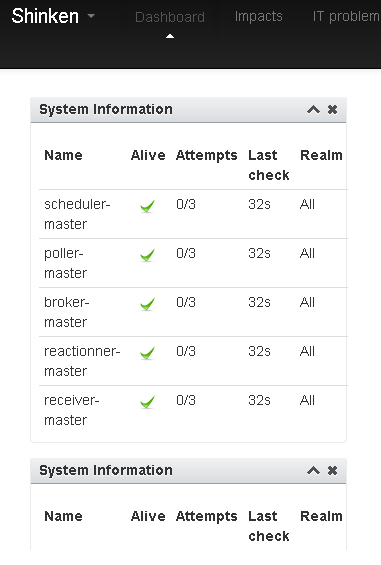
* vous devez obtenir au final ceci :
Comme cela est indiqué, il faut installer une base de données pour stocker les préférences utilisateurs. Il est possible d'utiliser mongodb ou SQLite. Vous allez utiliser SQLite.
Pour installer SQLite il faut procéder en 2 étapes.
* Installer les paquets :
<code shell>
root@ctShinken:~# apt-get install mongodb python-pymongo
</code>
* Installez le module sqlitedb pour shinken (rappel : terminal avec su – shinken toujours).
<code shell>
root@ctShinken:~# su - shinken
shinken@ctShinken:~$ shinken install sqlitedb
shinken@ctShinken:~$ exit
root@ctShinken:~#
</code>
* Etablissez une relation entre webui et sqlitedb dans le fichier de configuration de webui /etc/shinken/modules/webui.cfg :
<code>
modules auth-cfg-password,SQLitedb
</code>
(Attention pas d'espace entre les différents modules).
* Pour finir, il ne faut pas oublier de relancer shinken :
<code shell>
root@ctShinken:~# service shinken restart
</code>
* vous devez obtenir au final ceci :
 * L'installation de widget (composant d'interface graphique permettant d'obtenir des informations) se fait sans problème, par exemple vous pouvez installer le widget Sytem state :
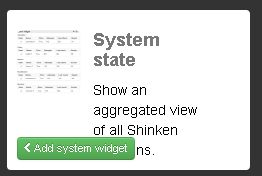 * et obtenir :
Information : l'otilitaire shinken nous permet de voir les modules installé grâce à l'option inventory :
shinken@debianWheezy:~$ shinken inventory
auth-cfg-password
webui
==== Je reviens au menu Shinken ====


